How to Install Batching Plant Belt Conveyors: A Technical Guide
Avoid belt drift and premature wear with our 5-step engineering-grade installation protocol.
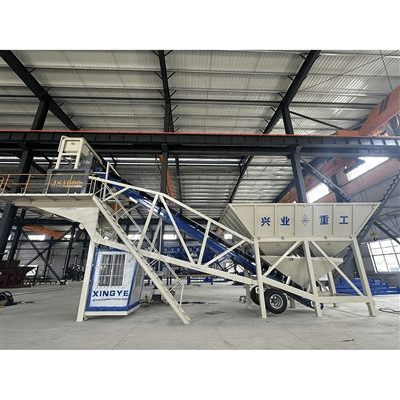
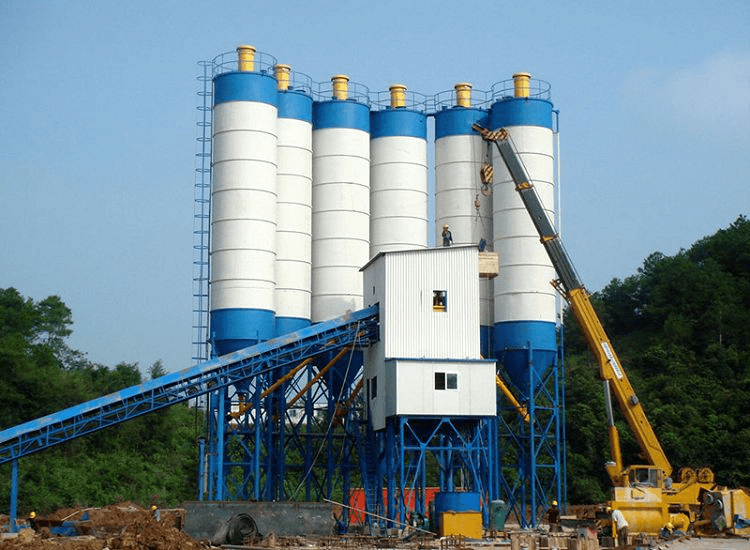
In a high-capacity concrete batching plant (like the HZS90 or HZS120), the belt conveyor is the lifeline of the operation. Poor installation doesn't just lead to aggregate spillage; it causes uneven belt wear, motor strain, and catastrophic drift that can shut down a site for days. At Xingye Machinery, we’ve refined the installation process to ensure maximum uptime even in the harshest environments of the Middle East and Southeast Asia.
Pre-Installation: Structural Integrity First
Before lifting any components, verify the foundation levels. A deviation of even 5mm at the base can lead to significant alignment issues once the 40-meter conveyor is fully extended. Ensure all anchor bolts meet the grade requirements for the specific soil conditions of your site.
Step 1: Head Frame and Primary Support Assembly
The installation begins at the discharge end. Connect the head frame of the belt conveyor to the main mixing platform. Key Engineering Note: Bolt the support legs to the frame while on the ground before lifting the assembly as a single unit. Once hoisted, secure the legs to the foundation using high-strength anchor bolts. This ensures the discharge point is perfectly centered over the mixer inlet.
Step 2: Middle Section and Tail Frame Integration
Progress from the head toward the tail. Connect the middle frames to the platform supports, ensuring each section is perfectly linear. Finally, install the tail frame (the loading point). For plants operating in high-wind regions, ensure all bracing is torqued to manufacturer specifications to prevent structural oscillation.
Step 3: Belt Splicing and Threading
Once the framework is rigid, thread the rubber belt through the rollers.
- Measurement: Cut the belt based on the actual measured path length, accounting for the take-up pulley position.
- Splicing: Use high-quality cold-bonding adhesive or hot vulcanization for heavy-duty JS-series mixer feeds. A weak joint is the most common point of failure in the first 500 hours of operation.
Step 4: Precision Tensioning and Tracking
Adjust the tensioning device (usually a screw or gravity take-up) until the belt is taut but not over-stressed. The "Rule of Thumb": The belt should have enough tension to prevent slippage at the drive pulley under full load, but enough flexibility to allow for thermal expansion in hot climates like Saudi Arabia or Vietnam.
| Installation Checkpoint | Tolerance/Requirement | Criticality |
|---|---|---|
| Frame Linearity | ±2mm over 10 meters | High (Prevents drift) |
| Roller Leveling | Horizontal within 0.5° | Medium (Reduces belt wear) |
| Belt Joint Strength | >85% of base material | Critical (Safety) |
Step 5: Weatherproofing and Final Commissioning
After a successful dry run (no-load test for 2 hours), install the guide troughs and the rain cover. In monsoon-prone regions or dusty desert environments, the rain cover is not optional—it protects the aggregate from moisture changes and prevents dust from fouling the mechanical components.
Expert Support for Your Project
Are you planning a new HZS-series plant installation? Xingye Machinery provides full CAD foundation drawings and on-site engineering supervision to ensure your equipment is commissioned for a 10+ year service life. Contact our technical team for a consultation on your specific site requirements.
Related Posts :