Mixer Down? a 7-Step Troubleshooting Guide for JS-Series Mixers
Every hour of downtime costs thousands in lost concrete. Here is how to diagnose and fix your JS-series forced mixer fast.
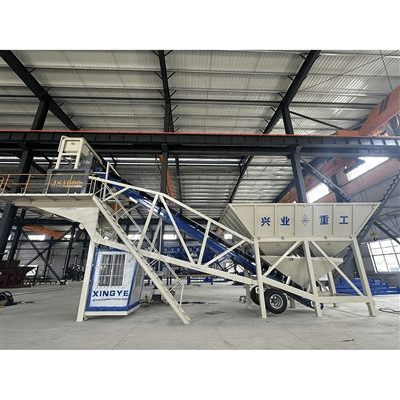
In a concrete batching plant, the twin-shaft forced mixer (JS-series) is the heart of the operation. When the "main engine" stops, the entire site—from transit mixers to pumping crews—grinds to a halt. Whether you are operating an HZS60 in the heat of Riyadh or an HZS120 in the humid climates of Southeast Asia, a structured troubleshooting protocol is essential to minimize expensive downtime.
Common JS-Series Mixer Failure Modes
Before diving into the steps, identify which category your fault falls into. Most issues in forced mixers are either electrical (control/motor) or mechanical (transmission/seals).
| Symptom | Potential Root Cause | Immediate Action |
|---|---|---|
| Motor hums but won't start | Phase loss or material overload | Check voltage/Clear mixing drum |
| Mixing shaft stalling | Foreign object or worn belt/coupling | Inspect for aggregate jamming |
| Slurry leaking from ends | Shaft seal failure (Pressure system) | Check grease pump and seal rings |
| Abnormal gearbox noise | Gear wear or lubrication failure | Check oil levels and metal shavings |
Step 1: Fault Identification & Data Capture
Do not attempt a fix until the symptoms are clear. Is the motor tripping the circuit breaker? Is there a mechanical grinding sound? In modern HZS plants, check the PLC control interface for specific error codes related to "Mixer Overload" or "Thermal Trip."
Step 2: Preliminary Site Investigation
Check the obvious culprits first. In high-temperature regions like the Middle East, electrical cabinets can overheat, causing false trips. In Southeast Asia, high humidity can lead to terminal corrosion. Ensure the material in the drum hasn't exceeded the rated capacity (e.g., 1500L for a JS1500).
Step 3: Safety First (Lockout/Tagout)
Never enter the mixing drum or open the junction box without a full Lockout/Tagout (LOTO) procedure. Disconnect the main power supply and secure the switch with a personal lock. In a pressurized system, ensure the pneumatic discharge gate is de-energized to prevent accidental closure.
Step 4: Detailed Mechanical & Electrical Inspection
Open the motor junction box to measure input voltage across all three phases. For mechanical issues, inspect the gap between the mixing blades and the liner plates. If the gap exceeds 5-8mm, large aggregates can wedge between them, causing a stall. Check the shaft end seals—if concrete paste is leaking into the bearings, the seal system requires immediate replacement to prevent catastrophic bearing failure.
Step 5: Component Repair or Replacement
Xingye Machinery recommends using only genuine OEM parts for JS-series mixers. High-chromium alloy liners and blades offer superior wear resistance against abrasive desert sands. If the planetary gearbox shows signs of internal damage, it is often more cost-effective to replace the unit than to attempt a field rebuild that lacks factory tolerances.
Step 6: Controlled Trial Run
After the repair, perform a "dry run" (empty drum) first. Monitor the motor current (Amps) to ensure it stays within the nameplate rating. Check for unusual vibrations or heat buildup in the bearings. Once the dry run is successful, perform a test batch at 50% capacity before returning to full production.
Step 7: Documentation and Preventive Strategy
Record the fault in your plant's maintenance log. Was the failure caused by a lack of lubrication in the automated grease pump? Or was the aggregate grading too large for the mixer? Adjusting your preventive maintenance schedule—such as weekly blade tightening and daily seal inspections—is the only way to prevent a repeat occurrence.
Expert Support for Your Batching Plant
If your mixer requires specialized parts or technical consultation, Xingye Machinery’s engineering team is available to assist with HZS-series and JS-series equipment worldwide. Contact our technical department for CAD drawings or maintenance kits.
Related Posts :